 The latest project: drafting and constructing a circa 1911 simple corset cover of muslin.
 - measuring for a basic shirtwaist pattern,
- drafting it up into a pattern and adjusting it to a corset cover,
- cutting the fabric,
- and step by step construction and finishing;
- a photo of the finished product is included.
 This particular pattern produces a corset cover with an interior waist drawstring or "tape", and then a short peplum that helps keep the corset cover in place. Many corset covers don't have such a peplum; you can easily find them on Ebay.
The textbook photo shows a simply trimmed garment with modest lace at neck and armholes, and the directions say that armholes could be simply bound with bias tape, although you could make a corset cover with all kinds of decoration from tucks to beading, or make it of eyelet fabric.
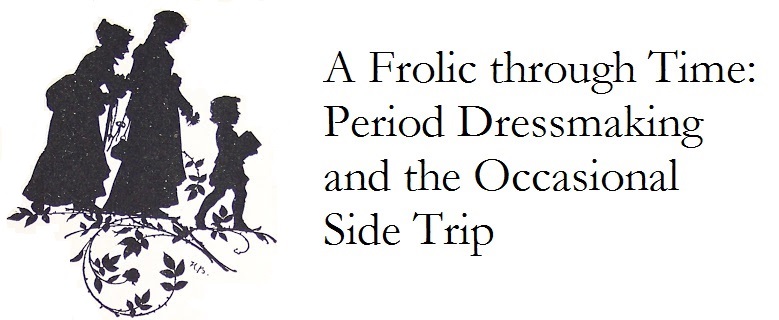
(Above, the corset cover with waistline tape channel pinned to it, from the back)
Drafting the Pattern
 The pattern only requires two pattern pieces, front and back...but the front is split into two pieces for a total of three pieces. I drafted it in about two hours, including checking it and cutting it. Remember though that I am a slow worker; someone with a bit more experience could knock it out rapidly. There is also an oblong piece of fabric that you cut out to make the channel for the interior tape or drawstring to go through.
The "model" measurements for this pattern are about 15" across the shoulders and and a 24" waist. My 30" waist circumference resulted in a more boxy-shaped pattern, but the result on the mannequin still looks good.
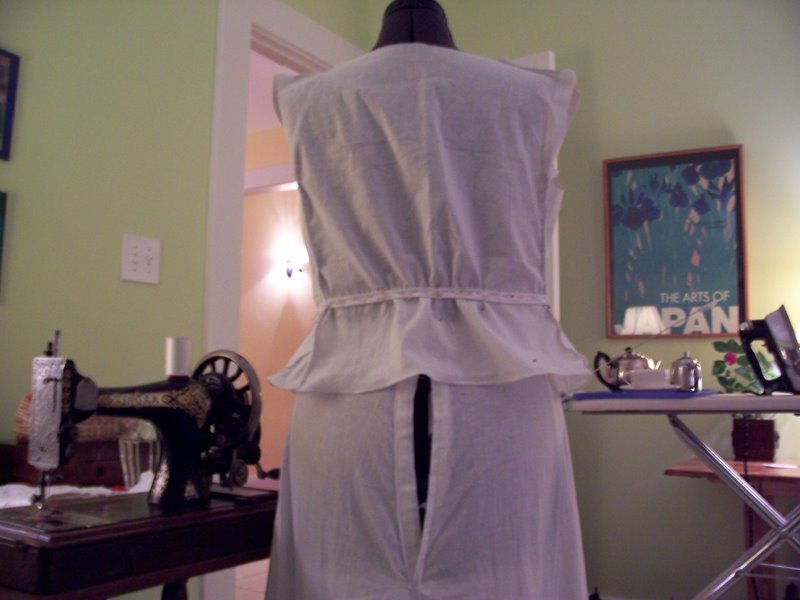
(Above: the pattern draft sample as it appears in the textbook. The numbers are drafting points you use to build your own draft, not measurements.)
Notes on Cutting and Construction
- If you're unsure of your drafting skills, leave about an inch or so all around as seam allowance so that you can alter as necessary.
 When you have cut out both fronts and backs, mark the right side of the fabric carefully (with something that will wash out) too. Then pin the shoulders and sides, with the right sides on the outside, wrong sides together. Now, most directions would say, do this on the wrong side of the fabric. Not this time! You'll be sewing French seams, for which the first seam is on the right side of the fabric!
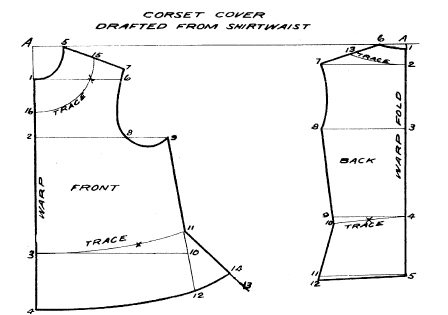
 - Once it's pinned and you're happy with the fit, then baste it, again, wrong sides together. Um, I didn't pay attention, and on autopilot, pinned and basted wrong sides together. So when it came time to make French seams, I had no markings to work with. I had to take everything out and start over. Whoops. Don't make the same mistake! (Above, the corset cover pieces pinned up for initial fit. I have yet to cut the front into two halves; a tester box pleat is set up to mimic the button hole pleat.)
- I found that pinning and basting on the dress form felt good after a first few minutes of feeling strange.
- The corset cover closes in front with four small pearl buttons. The right front, that holds the button holes, is constructed with a "box plait", which turns out to look an awful lot like the narrow sewn-down pleat (sewn down on both vertical sides) that seems to make up the fronts of many men's and women's shirts. The result is that you have several layers to support those button holes so they won't rip.
- After you make up the box pleat, do up the French seams on sides and shoulders. To make these seams: run the first seam 1/4 inch out towards the edge of the fabric. from the seam line. Then, trim the seam allowance pretty close to that seam stitching. Then, turn fabric so that right sides are together, and run a second seam on the real seam line to enclose the raw edges inside it. Press the resulting seam so that it faces towards the inside back of the garment. Whoo! Yes, after awhile it seems more natural to do this, and it sure has a nice, tidy, luxe effect.
 Put the corset cover back on the dress form, this time inside out. On your pattern draft, you'll have made a series of X's that mark where you should gather the waist together. Silly me, I didn't follow directions. I gathered the full back, instead of just in the center of the back. Silly me again, on the front I gathered from the sides halfway to the front, instead of just across the center of the front. Once again, had to pull it out and do it over.
(Above, closeup of front, with waistline gathered and tape channel basted. Note that gatherine is not heavy because you don't want the garment to be too poufy.)
Put the corset cover back on the dress form, this time inside out. On your pattern draft, you'll have made a series of X's that mark where you should gather the waist together. Silly me, I didn't follow directions. I gathered the full back, instead of just in the center of the back. Silly me again, on the front I gathered from the sides halfway to the front, instead of just across the center of the front. Once again, had to pull it out and do it over.
(Above, closeup of front, with waistline gathered and tape channel basted. Note that gatherine is not heavy because you don't want the garment to be too poufy.)
- The text asks you to do two rows of gathers, 1/2 inch apart. Couple of good reasons for this. First, that's the width of the narrow strip of fabric that is sewn from one side of the waist to the other that forms the channel to put the waist tape through. Voila: automatic markings for placing it. Second, you get a more even gather. Just try to make sure that the positioning of your gathering stitches match decently one to the other. I'd tie off the gather at the end you'll be pulling from. On the other end, leave a long string so you can pull your gathers together.
 Gather as the text suggests, and use the photo as your guide. Then make up that channel strip from the directions, and pin it to the waistline, placing on top of those two rows of gathers. Arrange the gathers one last time, and baste in place.
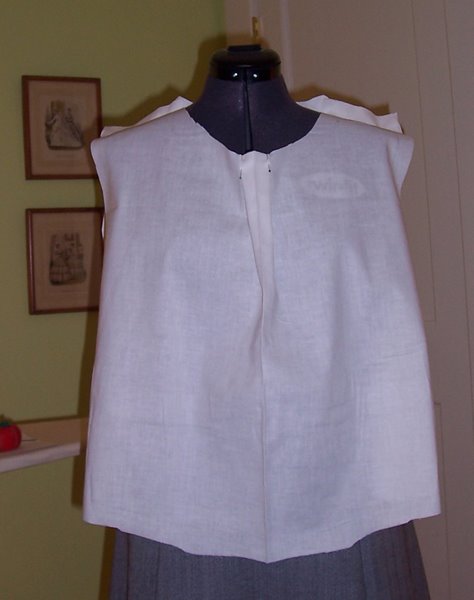


(Above, the Singer 27 handcrank sewing machine used for this project. It does wonderful tiny stitches and uses really neat attachments, sans electricity.)
That's where I am to date. Back with the final product soon as it's done!
No comments:
Post a Comment